Creating and configuring the Azure File Sync service
In the next demonstration, we are going to configure Azure File Sync. You will need the following to be in place to follow this demonstration:
• Windows Server: You may use Windows Server 2012 R2, 2016, or 2019. Make sure that you enable Remote Desktop (RDP) on the server.
• A storage account: This storage account needs to be created in one of the supported regions for Azure File Sync. You can refer to the following website for the available regions: https://azure.microsoft.com/en-gb/global-infrastructure/services/?products=storage.
• An Azure file share: This must be provisioned in the preceding storage account.
Top Tip
Opening the RDP port for a VM during creation is covered later in the book.
This can be configured on VM creation in Azure.
Once the preceding resources are created, we can start with the creation of the Azure File Sync service in Azure and the installation of Azure File Sync on the Windows Server.
First, we will create the Azure File Sync service in Azure. Therefore, take the following steps:
- Navigate to the Azure portal by opening https://portal.azure.com.
- In the left menu, click+ Create a resource, and in the search box, type Azure File Sync. Click Azure File Sync in the search results. On the following screen, click Create.
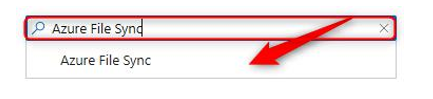
Figure 7.25 – Searching Azure File Sync
- Choose a Storage Sync Service name and the resource group that has the storage account you have deployed for this, and then select the same region as the storage account. After entering the values, click Review + Create. Click Create.
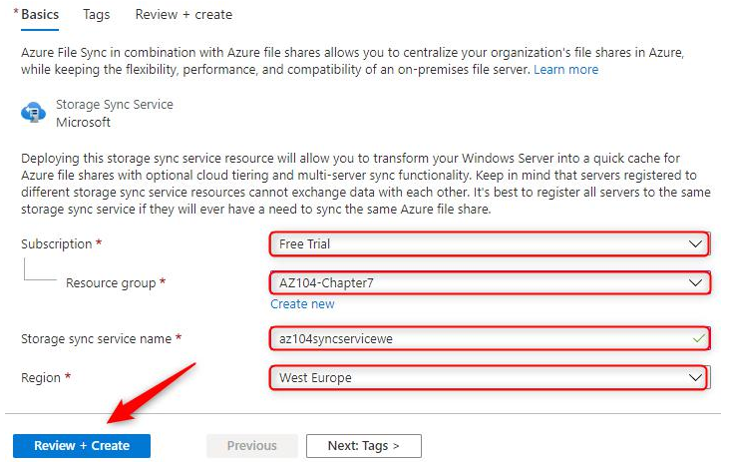
Figure 7.26 – Deploying Azure File Sync
- After deployment, open the Storage Sync Service and click + Sync group in the top menu.
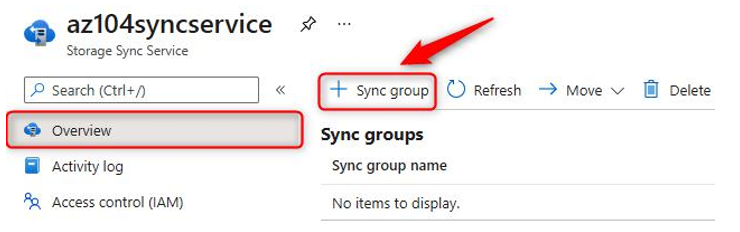
Figure 7.27 – Creating an Azure File Sync group
- Enter a sync group name, choose a subscription, select your storage account, and choose the Azure file share you created at the beginning of this section. Click Create.
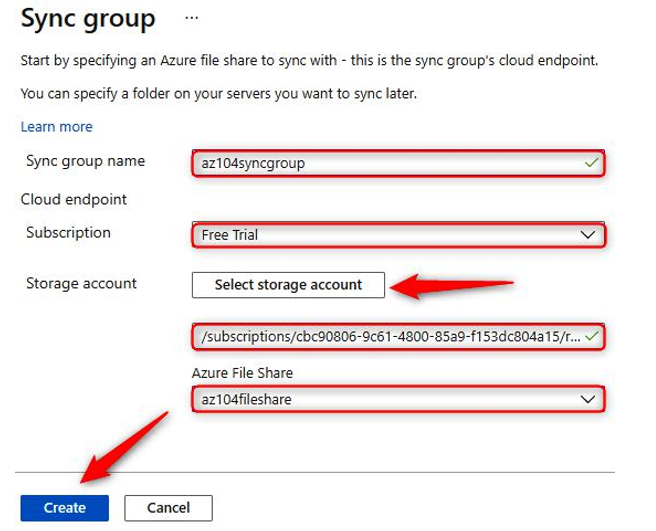
Figure 7.28 – Deploying an Azure file sync group
- RDP to Windows Server and log in. You should first disable Internet Explorer Enhanced Security Configuration. Open Server Manager, select Local Server, disable it for administrators, then click OK.
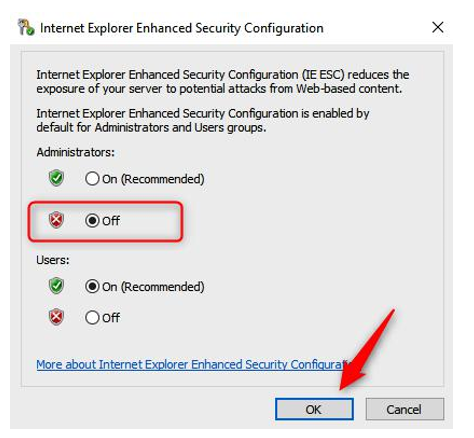
Figure 7.29 – Disabling Enhanced Security Configuration
- Download the Azure File Sync agent from the following website and select the appropriate downloader: https://www.microsoft.com/en-us/download/ details.aspx?id=57159.
- Install the agent on the server. Keep the default path to install the agent. On the next screen, enable Use the existing proxy settings configured on the server.
- Click Next.
- Select Use Microsoft Updateand click Next. On the following screen, click Install.
- The ServerRegistration tool will start to run. This is where we can register the server. You need to sign in by clicking the Sign in button (leave the Azure environment as AzureCloud).
- Choose the Azure subscription, resource group, and Storage Sync Service, then click Register.
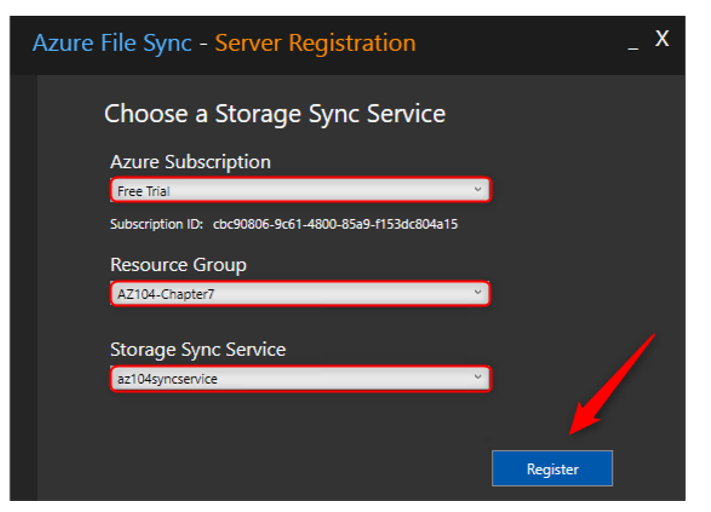
Figure 7.30 – Azure File Sync – Registering
- After the registration is successful, there is a trust relationship established between the on-premises server and the Storage Sync Service in Azure. Click OK.
- Now, you need to go back to the Azure portal. Go to the Storage Sync Service again and select the sync group that you created earlier. In the sync group settings blade, select Add server endpoint in the top menu.
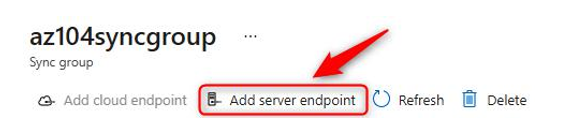
Figure 7.31 – Azure File Sync – Adding a server endpoint
- Select the registered server and provide the path: D:\Data. Keep Cloud Tiering as Disabled and leave Initial Sync configured as the merge option, with the Initial download configuration set to Download the namespace first. Click Create.
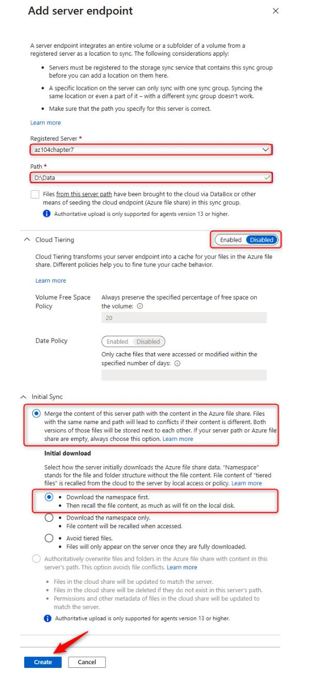
Figure 7.32 – Azure File Sync – Adding a server endpoint
- If you now go back to the VM where we installed the sync agent and open the D: drive, you will see that there is a folder added called Data. You can copy files to it, as shown in the following screenshot:
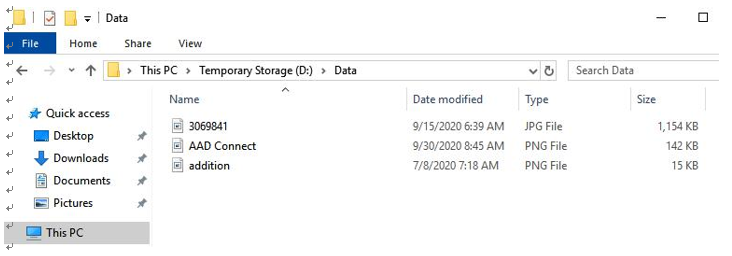
Figure 7.33 – Azure File Sync – Images stored in the Data folder
- When you switch back to the file share in Azure, you will see that all the files are synced to the storage account in Azure, as shown in the following screenshot:

Figure 7.34 – Azure File Sync – Synced files in Azure file storage
This concludes the section about Azure file storage and the Azure File Sync service. In the next section, we are going to look at Azure Storage replication.